In summary:
- Mastering fundamental principles like tire pressure and wheel placement is more critical than vehicle modifications.
- Understanding your vehicle’s mechanical limits, such as air intake height and gear ratios, prevents catastrophic failures.
- Specific Canadian terrains, from Prairie mud to the Laurentian shield, require distinct driving techniques.
- Proper safety procedures, like correct steering wheel grip, are non-negotiable to prevent serious injury.
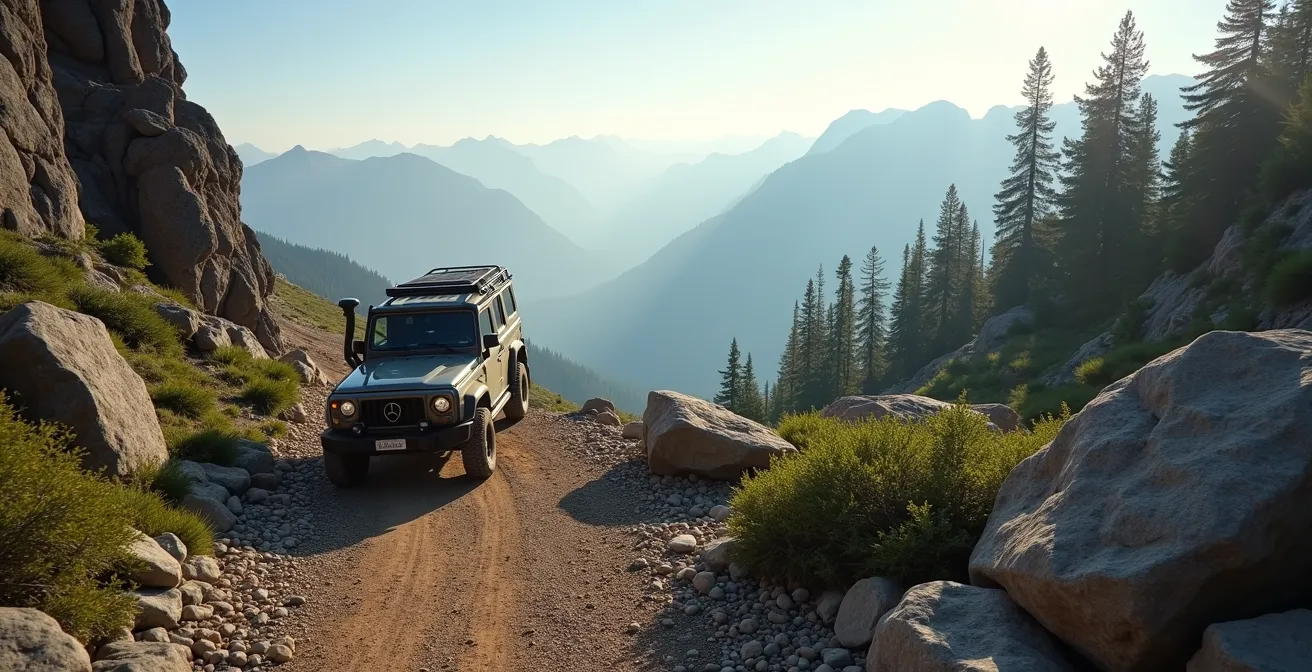
You’ve brought home your new Jeep, F-150, or 4Runner. The allure of the Canadian backcountry, the logging roads, and the untouched trails is undeniable. But a nagging question lingers: how do you venture out there without getting hopelessly stuck or, worse, causing expensive mechanical damage? Many beginners believe the answer lies in buying more gear—bigger tires, winches, and light bars. While equipment has its place, it’s a common misconception that it replaces skill.
The internet is full of generic advice like “air down your tires” or “use 4-Low.” This is the “what,” but it critically misses the “why.” Without understanding the physics of a tire’s contact patch or the mechanical advantage of torque multiplication, you’re merely following a checklist. True confidence and capability—what we in the professional training world call mechanical sympathy—come from understanding the principles behind the techniques. It’s the difference between being a driver and being an operator.
This guide moves beyond the platitudes. We will dissect the core techniques of off-road driving, not as a set of rules, but as an application of physics and mechanical engineering. You will learn not just *how* to place your wheels, but *why* a specific placement protects your differential. You won’t just be told to avoid deep water; you’ll learn how to identify your vehicle’s specific fording depth to prevent a catastrophic failure known as hydrostatic lock. This approach will build your intuition, allowing you to read the terrain and make smart decisions that preserve both your vehicle and your safety.
This article breaks down the essential skills every new off-roader in Canada must master. By exploring each of these core competencies, you will build a solid foundation for safe and successful adventures, understanding the mechanics and physics that keep you moving forward.
Summary: Off-Roading for Beginners: Essential Techniques to Avoid Getting Stuck
- Why lowering pressure to 20 PSI improves traction and comfort?
- How to assess the depth of a ford before plunging your hood into the water?
- Rock or rut: how to place your wheels to avoid hitting the differential?
- The risk of fracture: why never grip the inside of the steering wheel in rough terrain?
- When to use low range: steep climb or descent technique?
- The myth of the 4×4 invincible: why your SUV still slides without good tires?
- Metallic noise or sagging: how to spot a broken coil spring from Quebec’s roads?
- Driving on Sand, Mud, and Gravel: Adjusting Your Technique for Each Surface
Why lowering pressure to 20 PSI improves traction and comfort?
The single most effective change you can make to your vehicle’s performance off-road is not a suspension lift or a new set of tires—it’s adjusting the air pressure inside them. Dropping your tire pressure from its on-road setting (typically 35-40 PSI) down to around 20 PSI fundamentally alters how your vehicle interacts with the trail. This isn’t a magic number, but a starting point for understanding a critical concept: the contact patch.
At highway pressures, your tire is firm, and only a small, stiff patch of rubber meets the road. When you lower the pressure, the tire becomes more pliable. This allows it to spread out and deform over obstacles, dramatically increasing the size of the contact patch. Think of the difference between walking on snow in high heels versus snowshoes. The larger footprint distributes weight and provides significantly more grip. This increased surface area is what allows your vehicle to “float” over soft surfaces like sand and deep snow, rather than digging in and getting stuck.
The image below clearly demonstrates this principle on the kind of rocky terrain found throughout the Canadian Shield. Notice how the deflated tire molds itself to the rock’s surface, maximizing rubber-to-ground contact.
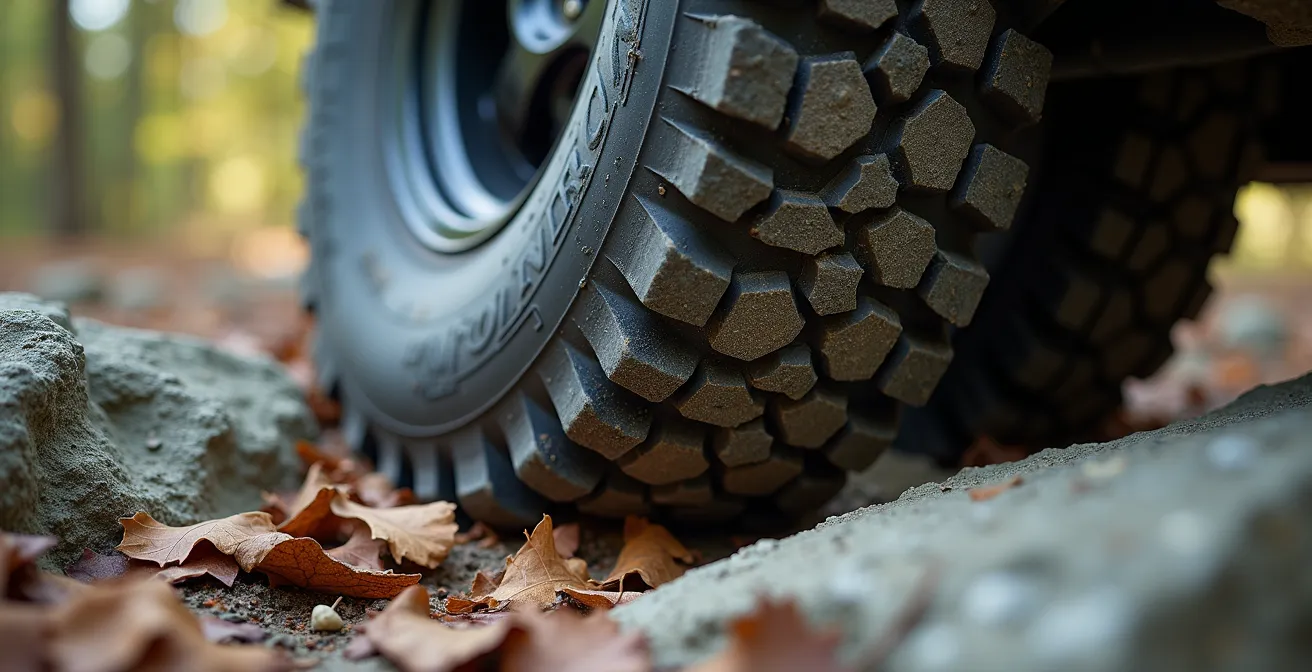
As you can see, this flex has a secondary benefit: comfort. A softer tire acts as an additional shock absorber, soaking up the harsh jolts from rocks and roots before they reach your suspension. This reduces wear and tear on your vehicle’s components and significantly lessens driver fatigue on long trail days. However, remember that lower pressures make your tire’s sidewall more vulnerable to punctures from sharp rocks and require you to reduce your speed accordingly. Always carry a reliable air compressor to re-inflate your tires before returning to the highway.
How to assess the depth of a ford before plunging your hood into the water?
Water crossings are one of the most intimidating and potentially destructive challenges in off-roading. The consequences of getting it wrong are severe, leading to a catastrophic engine failure known as hydrostatic lock. This occurs when water is sucked into your engine’s air intake, and because water cannot be compressed like air, it instantly stops the pistons, bending connecting rods and destroying your engine from the inside out. The key to avoiding this is knowing your vehicle’s specific wading depth and never exceeding it.
Your vehicle’s safe fording depth is determined by two main factors: the height of your air intake and the location of sensitive electronics, like the engine control unit (ECU). Before ever attempting a water crossing, you must physically open your hood and identify where your engine breathes from. Is it high up in the fender? Or is it low down behind the headlight? A good rule of thumb is that the water should never come over the top of your tires, but the absolute limit is your air intake. A snorkel is a common modification that raises this intake point, but for a stock vehicle, the factory location is your hard limit.
Before entering any water, always stop and assess the situation. Walk the crossing first if it’s safe to do so, using a stick to check for depth and hidden obstacles. Look for signs on the bank indicating the high-water mark from other vehicles. If there is a current, enter the water angled slightly upstream, creating a “bow wave” with the front of your vehicle. This wave creates a depression in the water level around your engine bay, helping to keep the air intake clear. Drive through at a steady pace—not too fast to flood the engine bay, and not so slow that you lose your bow wave.
The following table, based on an analysis of popular 4×4 models in Canada, gives you a general idea of where the air intakes are located and their approximate safe fording depths. Always confirm the specifics for your own vehicle.
| Vehicle Model | Air Intake Location | Safe Fording Depth |
|---|---|---|
| Ford F-150 | Behind driver’s headlight | 20-24 inches |
| Toyota Tacoma/4Runner | Passenger side fender | 18-20 inches |
| Jeep Wrangler | Above passenger wheel well | 30 inches (Rubicon) |
| Chevrolet Silverado | Driver’s side engine bay | 20-24 inches |
Rock or rut: how to place your wheels to avoid hitting the differential?
Once you’ve mastered tire pressure, the next level of off-road skill is precise wheel placement. It’s about developing an understanding of your vehicle’s dimensions and vulnerabilities. The lowest point on most solid-axle 4x4s is the differential housing—often called the “pumpkin.” Hitting this on a rock can cause it to crack, leak gear oil, and leave you stranded. The goal is to always place your tires on the highest points of the terrain to maximize your ground clearance and keep your sensitive underbelly safe.
When approaching an obstacle like a large rock, don’t try to drive straight over the middle of it. Instead, aim to put either your driver-side or passenger-side tires directly on top of the rock’s peak. This lifts that entire side of the vehicle, providing maximum clearance for the differential in the center of the axle. The same principle applies to deep ruts, common on Canadian logging roads. You have two choices: either position your vehicle to straddle the rut completely, keeping both tires on the high ground, or commit one side of the vehicle fully into the rut. The worst thing you can do is try to split the difference, which often results in the differential dragging along the centre hump.
This is where a spotter—a trusted co-driver outside the vehicle—becomes invaluable. From the driver’s seat, it’s often impossible to see exactly where your tires are in relation to an obstacle. A spotter provides the crucial perspective needed to guide you, inch by inch, onto the correct line. While most stock 4x4s are surprisingly capable, technique is what allows them to navigate more challenging terrain. Skillful driving that protects the vehicle’s vulnerable parts is far more important than having the most heavily modified rig on the trail.
Your Action Plan: Navigating Canadian Shield Obstacles
- Assess the obstacle: Identify the highest points of a rock or the edges of a rut. This is your target line.
- Communicate with a spotter: Establish clear hand signals to guide your wheel placement when navigating blind obstacles.
- Lift, don’t straddle: Place your tire on the peak of a rock to lift the differential over the danger zone.
- Commit to the rut: When faced with deep ruts from logging trucks, either straddle them completely or drop one side in fully. Avoid high-centering the differential.
- Invest in protection: If you plan to tackle rocky trails frequently, install steel skid plates. They are essential insurance for your vehicle’s undercarriage in Canadian conditions.
The risk of fracture: why never grip the inside of the steering wheel in rough terrain?
While much of off-road training focuses on the vehicle, personal safety is paramount. One of the most common and easily avoidable injuries for beginners is a broken thumb or wrist caused by improper steering wheel grip. This happens due to a phenomenon called “steering kickback.” When a front tire hits an obstacle unexpectedly—like a hidden rock or a deep rut—the force is transferred back through the steering linkage. Modern power steering dampens this effect, but it doesn’t eliminate it. The steering wheel can be violently and instantly spun with incredible force.
If your thumbs are wrapped around the inside of the steering wheel rim, they are directly in the path of the spokes. When the wheel kicks back, the spokes can catch your thumbs, breaking them against the rim. The correct and safe technique is to always keep your thumbs on the outside of the wheel, resting on top or along the rim, in a “thumbs-up” position. Your hands should be at the 9 and 3 o’clock positions (or 10 and 2), allowing you to “feed” the wheel through your hands for sharp turns rather than using the hand-over-hand method common in street driving.
Case Study: The “Thumbs-Up” Rule on Canadian Forest Service Roads
Experienced off-road instructors in Canada emphasize the “thumbs-up” grip as a non-negotiable safety standard. Even with modern power steering, the force from wheel impacts on the notoriously rough and unpredictable Canadian Forest Service Roads can cause serious hand injuries. A proper grip not only prevents acute injury from a single large impact but also significantly reduces driver fatigue during long drives over the corrugated “washboard” surfaces common on remote access routes. Maintaining this discipline ensures you remain in control and pain-free, even after hours on the trail.
This is not just a suggestion; it’s a critical safety habit. As the official training literature makes clear, the forces involved are not to be underestimated.
A sudden impact on a tire is violently transferred through the steering system, creating enough force to break a thumb.
– Off-Road Safety Manual, Michigan Off-Road Education Guide
When to use low range: steep climb or descent technique?
Every true 4×4 is equipped with a transfer case that offers two gear ranges: 4-High (4H) and 4-Low (4L). Beginners often mistakenly think 4L is just for getting “really stuck.” In reality, its primary purpose is control. Engaging 4L is like shifting to the easiest gear on a mountain bike; it doesn’t just provide more power, it provides massive torque multiplication and speed reduction. This is the key to navigating technical terrain safely.
You should engage 4L for any situation that requires slow, precise control, whether it’s a steep climb or a technical descent. On a steep, loose climb, such as those found in the Alberta foothills, 4L multiplies your engine’s torque, allowing the vehicle to crawl upwards with minimal throttle input. This prevents wheel spin, which digs you into the surface and causes a loss of traction. You can simply let the vehicle idle its way up the obstacle, letting the gearing do the work.
Perhaps even more importantly, 4L is a critical safety tool for steep descents. In 4L and first gear, the engine and drivetrain provide significant “engine braking,” holding the vehicle back and allowing it to creep down a decline at a snail’s pace without you ever touching the brake pedal. “Riding the brakes” on a long, steep descent can cause them to overheat and fail. Using 4L gives you ultimate control, as illustrated in the image below where the driver is focused solely on steering, not braking.

The general rule is to engage 4L for any technical terrain where your speed will be consistently below 25 km/h. This includes rock crawling, navigating deeply rutted trails, or descending tricky sections in the Laurentians. Using 4L in these situations not only gives you more control but also prevents your automatic transmission from overheating as it’s not constantly hunting for the right gear. Remember to shift back to 4H or 2WD before accelerating on faster gravel roads or pavement.
The myth of the 4×4 invincible: why your SUV still slides without good tires?
A four-wheel-drive system is an incredible tool, but it’s not magic. It can send power to all four wheels, but it cannot create traction where none exists. The only connection your vehicle has to the ground are four postcard-sized patches of rubber. If those tires are not suited for the conditions, your advanced 4×4 system is useless. This is especially true in Canada, where “all-season” tires are often dangerously inadequate.
Many new SUVs and trucks are sold with M+S (Mud & Snow) rated tires. While this sounds capable, it’s a very basic standard that largely relies on tread design and does not guarantee performance in cold weather or on ice. The rubber compound on these tires becomes hard and loses its grip as temperatures drop below 7°C. A true winter-capable tire will have the Three-Peak Mountain Snowflake (3PMSF) symbol. This certification means the tire has met a minimum performance standard on packed snow and is made from a special compound that stays soft and pliable in the cold.
For a mixed-use off-road vehicle in Canada, a quality All-Terrain (A/T) tire with the 3PMSF rating is often the best year-round compromise. It offers a tougher construction and more aggressive tread for trail use, while still providing the certified winter performance required by law on many mountain passes, such as those in British Columbia. Investing in proper tires is the single most important upgrade you can make for both safety and capability.
This comparative table, based on information from tire industry guides, highlights the crucial differences in tire ratings for Canadian drivers.
| Rating Type | Symbol | Performance | Canadian Suitability |
|---|---|---|---|
| M+S (Mud & Snow) | M+S | Basic all-season | Inadequate for true Canadian winters |
| 3PMSF (Three-Peak Mountain) | Mountain/Snowflake | True winter rated | Required for BC mountain passes |
| All-Terrain | A/T | Off-road capable | Best year-round for mixed use |
Metallic noise or sagging: how to spot a broken coil spring from Quebec’s roads?
Off-roading puts stress on your vehicle, but in Eastern Canada, the biggest enemy of your suspension is often the drive to the trail itself. The heavy use of road salt, especially in provinces like Quebec, creates a highly corrosive environment. This corrosion attacks your vehicle’s undercarriage, and coil springs are particularly vulnerable. A spring can fail without warning, resulting in a sudden drop in one corner of the vehicle and a dangerous loss of handling.
It’s critical to perform regular post-trip and post-winter inspections of your suspension. A broken spring is often easy to spot visually. Look for a noticeable sag in one corner of the vehicle—it will sit visibly lower than the others. Get underneath with a flashlight and inspect the springs themselves. Look for cracks or a clean break in the coil. Sometimes, the broken piece will fall out completely, but often it will just settle, creating a metallic clunking or rattling sound as you drive over bumps.
According to repair data from automotive service centers, heavy road salt use can accelerate suspension component corrosion by up to 40% in Eastern Canada. This makes preventative inspections even more vital. While you’re under the vehicle, look for other signs of wear, such as oil leaking from your shock absorbers (indicating a failed seal) or fresh grease splattered inside your wheel wells, which points to a torn CV boot on an independent front suspension vehicle. Catching these issues early can prevent a catastrophic failure on the highway or a remote trail.
Post-Winter Suspension Inspection Checklist
- Check the Stance: Park on level ground and look at your vehicle from a distance. Does one corner sag or sit lower than the others?
- Inspect the Coils: Visually inspect each coil spring for obvious cracks, fractures, or missing sections.
- Look for Leaks: Check the body of each shock absorber for fresh, wet oil residue, a sign that the internal seals have failed.
- Listen for Sounds: Drive slowly over a small bump with the windows down. Listen for any sharp metallic clunks, pops, or rattles that weren’t there before.
- Perform a Bounce Test: Push down hard on each corner of the vehicle and release. It should bounce once and settle. If it continues to oscillate, your shocks are worn out.
Key Takeaways
- Tire pressure is not a setting, but a dynamic tool to control traction and comfort by manipulating the tire’s contact patch.
- Understanding the physical limitations of your vehicle, like air intake height and ground clearance, is the basis of risk assessment on the trail.
- Gearing (4-Low) is a tool for control, not just power. It enables safe ascents and, more importantly, controlled descents without brake failure.
Driving on Sand, Mud, and Gravel: Adjusting Your Technique for Each Surface
Once you understand the core principles of pressure, clearance, and gearing, you can begin to apply them to the diverse and challenging terrains found across Canada. Each surface requires a subtle adjustment in technique. Driving is no longer a monolithic activity but a dynamic response to the ground beneath your tires. This is where you combine science with feel to develop true driver intuition.
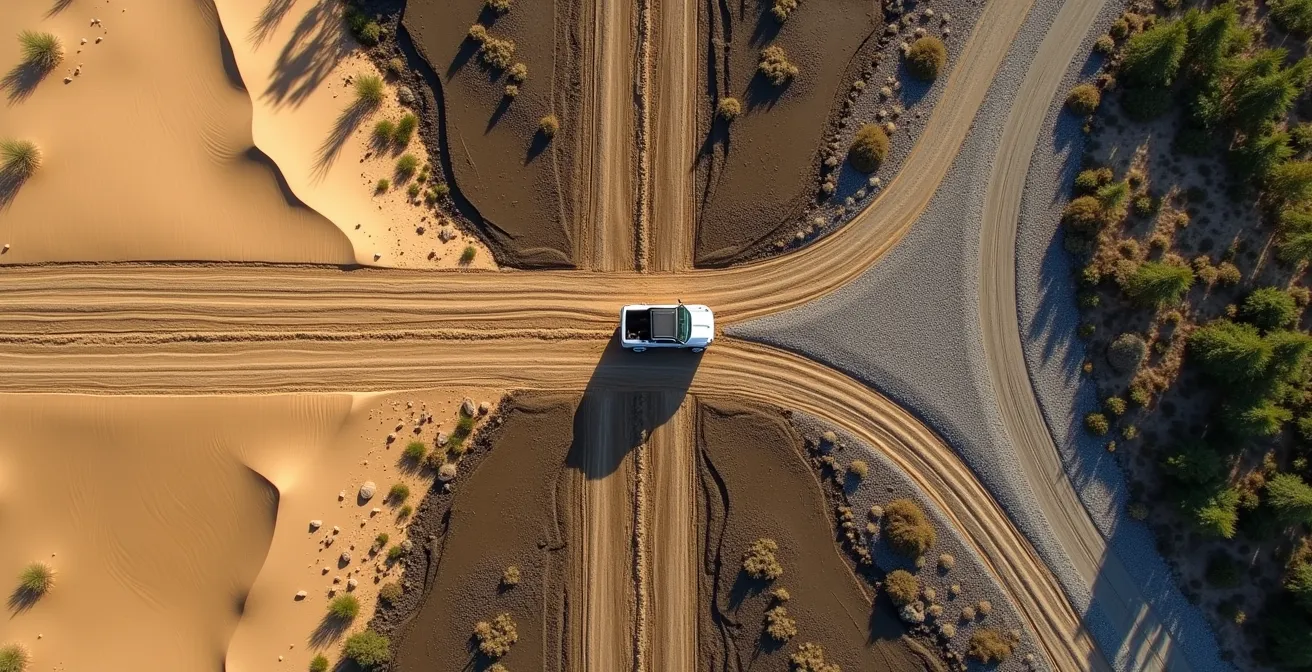
Sand, like the dunes at Sauble Beach or along the coast, demands flotation. This means maximum airing down (12-15 PSI) and maintaining momentum. Steering inputs should be smooth and gentle to avoid digging the front tires in. If you feel yourself losing speed, don’t floor it—that will only dig you deeper. Instead, try to turn slightly downhill to regain momentum.
Study: Adapting to Unique Canadian Terrains
Canadian off-roaders face unique challenges that require specific adaptations. The infamous ‘gumbo’ mud of the Prairies becomes incredibly sticky when wet, demanding steady momentum and a conscious effort to avoid any wheel spin, which coats tires and turns them into useless slicks. In contrast, the ‘muskeg’ of the north is an organic, often bottomless bog that prioritizes flotation and careful route selection above all else. Out in British Columbia, active logging roads with their deep, loose gravel require constant, small steering corrections and reduced speeds to maintain control, while winter wheeling in any forested area means being vigilant for hidden ice sheets under powder snow, where momentum is your friend until it suddenly becomes your enemy.
Mud is all about momentum and tread-clearing. A moderate amount of wheel spin can be useful to fling mud from the tire treads, allowing the lugs to bite again. However, too much spin will dig you down to the axles. Gravel roads, especially freshly graded logging roads, are like driving on marbles. Here, higher tire pressures (18-22 PSI) and smoother inputs on the throttle and steering are key to maintaining stability.
The table below provides a quick reference for adjusting your approach, but remember these are starting points. The ultimate guide is the feedback the vehicle gives you through the steering wheel and the seat of your pants.
| Terrain Type | PSI Range | Key Consideration |
|---|---|---|
| Prairie Gumbo Mud | 15-20 PSI | Maintain momentum, avoid spinning |
| Coastal Sand | 12-15 PSI | Maximum flotation needed |
| Rocky Shield | 20-25 PSI | Sidewall protection priority |
| Deep Snow | 10-15 PSI | Watch for ice layers |
| Logging Road Gravel | 18-22 PSI | Balance between grip and puncture resistance |
Now that you are equipped with the foundational knowledge of vehicle dynamics and recovery, the next logical step is to start applying these skills in a controlled environment. Begin by practicing on easy, well-documented trails and consider joining a local 4×4 club to learn from experienced members.