Mastering a long-distance tour isn’t about having the right gear; it’s about defeating the physical forces that cause fatigue.
- Wind noise and poor weight distribution are your biggest energy drains, far more than the distance itself.
- Modern laminated gear and personal hydration systems are not luxuries; they are critical tools for managing your body’s core temperature and focus.
Recommendation: Treat every packing decision as an energy calculation to maximize your endurance and enjoyment on the demanding roads of Canada.
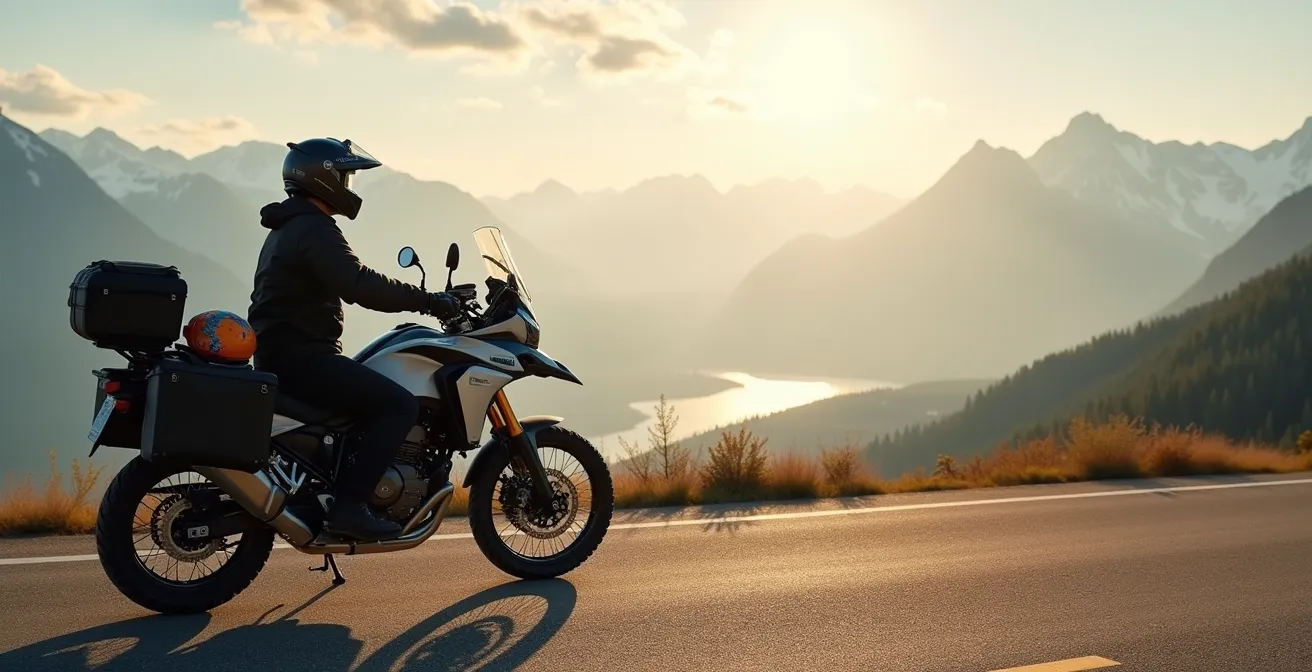
The fantasy of the open Canadian road is powerful: endless asphalt, epic landscapes, and total freedom. The reality, eight hours into a ride across the prairies, is often a screaming headache, an aching back, and a wrestling match with a bike that feels heavier with every kilometre. Most guides will tell you to “pack light” or “bring a good rain suit.” This is surface-level advice that misses the fundamental truth of long-distance riding. The real challenge isn’t your packing list; it’s physics.
This isn’t another checklist of things to buy. This is an energy management guide for the serious rider. We’ll approach your tour of the Gaspé Peninsula or your trek across the Trans-Canada Highway as an endurance event. The goal is to identify and eliminate the forces that drain your physical and mental reserves—what I call kinetic fatigue. Every decision, from how you load your panniers to the helmet you wear, either adds to this fatigue or subtracts from it. We’re here to subtract.
Forget adding more stuff. The minimalist veteran focuses on what can be removed: wind noise, excess weight high on the bike, and the constant, draining stress of being too hot, too cold, or wet. By breaking down each of these energy thieves, we can build a strategy that prioritizes endurance, comfort, and, ultimately, the safety and enjoyment of the ride.
This guide provides a structured approach to conquering the physical and logistical challenges of multi-day motorcycle travel in Canada. Explore the sections below to understand the science behind staying comfortable and safe on your journey.
Summary: Long-Distance Motorcycle Touring: Packing Light and Staying Comfortable
- Why Wind Noise Is Your Worst Enemy on an 8-Hour Ride
- Low Centre of Gravity: How to Pack Your Panniers Without Destabilizing the Bike
- Rain Suit vs. Laminated Gore-Tex: Which Gear Will Keep You Dry?
- The Danger of Dehydration Under the Helmet: Why You Need a Hydration System
- Chain, Alarm, or Cover: How to Deter Theft During Overnight Stops
- Average Speed vs. Photo Stops: Why You Should Add 25% to Your GPS Time
- Why Does EPS Foam Degrade After 5 Years, Even Without a Crash?
- Motorcycle Gear Safety Standards: Is Your Old Helmet Still Safe?
Why Wind Noise Is Your Worst Enemy on an 8-Hour Ride
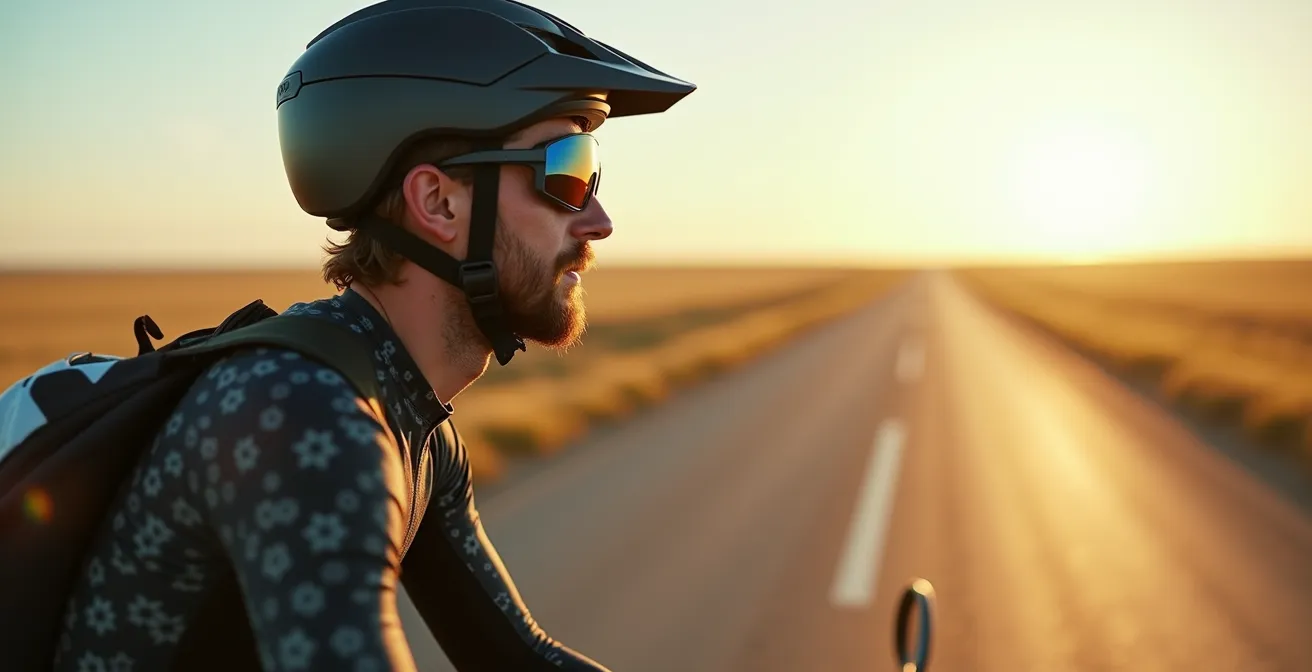
The constant roar of wind at highway speeds isn’t just an annoyance; it’s a primary source of kinetic fatigue. Your brain expends a massive amount of energy trying to filter out this relentless noise, depleting your mental reserves and dulling your reflexes. This isn’t subjective. According to research from hearing specialists, noise inside a helmet can reach 98 dB at just 120 km/h (74 mph), a level that can cause permanent hearing damage in minutes, let alone hours. This auditory assault is a direct drain on your daily energy budget.
A quiet helmet helps, but it’s not a complete solution. The only effective strategy is to block the noise at the source: your ear canal. This is non-negotiable for any ride longer than an hour. Filtered earplugs are an excellent starting point, as they are designed to cut the harmful frequencies of wind roar while still allowing important sounds like sirens and horns to pass through. For long, high-speed stretches on highways like the Trans-Canada, simple foam earplugs, which can offer over 25 dB of reduction, are an effective and cheap tool.
Some riders even install earmuffs inside their helmets, but this can create pressure points. The simplest solution is the best one. Do not start a long tour without a proven method of hearing protection. An annual hearing test is also a wise investment for any serious tourer to monitor for threshold shifts before they become permanent. Protecting your hearing is synonymous with protecting your energy and focus.
Low Centre of Gravity: How to Pack Your Panniers Without Destabilizing the Bike
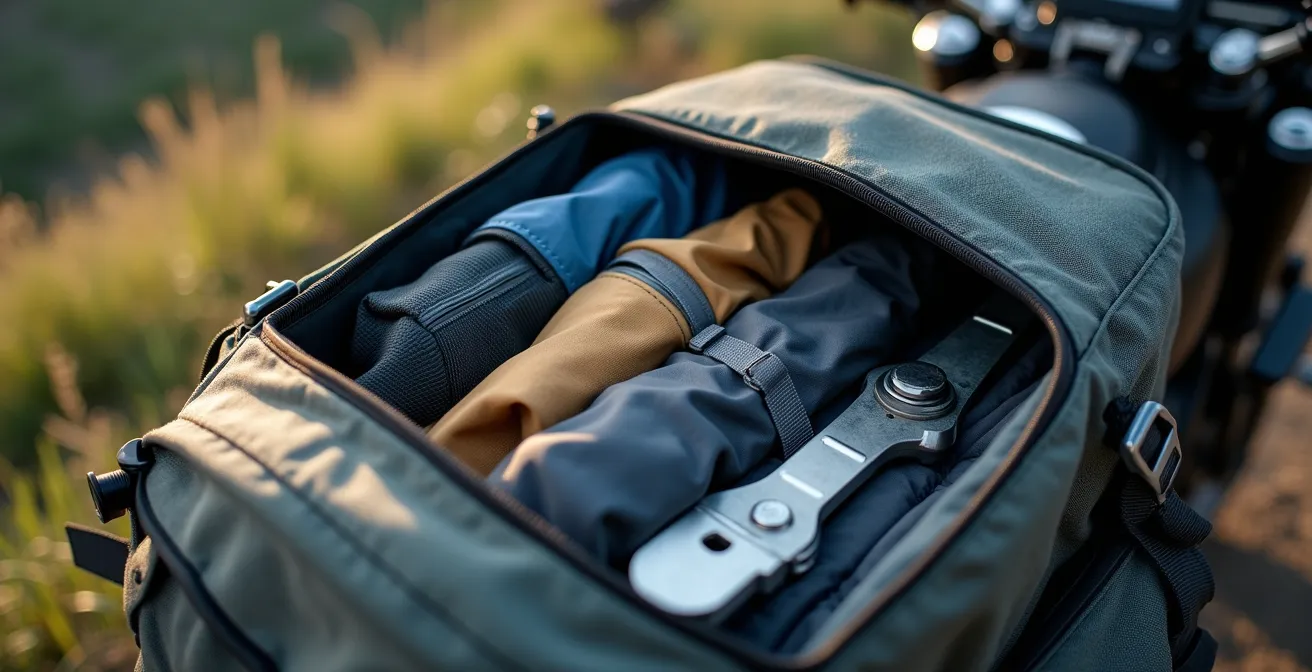
Every seasoned rider knows that a balanced load is important. A minimalist veteran, however, practices strict Centre of Mass (CoM) discipline. It’s not just about side-to-side balance; it’s about systematically placing every gram of weight as low and as close to the bike’s own centre of mass as possible. A high or rear-biased CoM acts like a pendulum, requiring constant, subconscious muscle corrections from you to keep the bike stable. Each correction is a small withdrawal from your energy budget.
The fundamental rule is simple: heavy items go low and forward. This means your tool roll, spare fluids, locks, and dense food items should be at the very bottom of your panniers, packed tightly against the frame of the bike. Lighter, bulkier items like sleeping bags or clothing go on top or in a tail bag. A top case is the worst place for heavy gear; it raises the CoM dramatically and has the most leverage to destabilize the machine. For trips through remote Canadian areas with few services, consider crash bar bags to move heavy items like tools and spare parts to the front, actively counter-balancing the rear luggage.
This principle of a low CoM directly translates to less physical effort, better handling in corners, and increased stability in crosswinds. The following table gives a practical breakdown for iconic Canadian routes, where terrain dictates strategy.
| Route Type | Weight Distribution | Priority Items | Center of Gravity Tips |
|---|---|---|---|
| Cabot Trail (Twisty) | 60% front, 40% rear | Tools bottom-left, fluids bottom-right | Keep panniers equally weighted |
| Trans-Canada (Highway) | 50/50 balanced | Extra fuel low-center | Heavy items against bike frame |
| Northern Quebec (Remote) | 40% front, 60% rear | Spare parts, extra fuel | Fuel canisters low in panniers |
| Rockies (Elevation) | Even side-to-side crucial | Quick-access rain gear top | Avoid top-heavy loading |
Rain Suit vs. Laminated Gore-Tex: Which Gear Will Keep You Dry?
Staying dry is not about comfort; it’s about survival and energy management. A wet rider is a cold rider, and your body burns an incredible number of calories trying to stay warm, leading to rapid fatigue and hypothermia, even in summer. The question is not *if* you need rain protection in Canada, but *what kind*. There are two main philosophies: a separate rain suit worn over your regular gear, or an integrated laminated waterproof shell (like Gore-Tex).
A simple rain oversuit is cheap and effective for short, intense downpours you might encounter in an Alberta thunderstorm. However, for the persistent drizzle of Vancouver Island or the multi-day wet conditions of a Newfoundland coastal tour, it has a critical flaw. Your outer riding jacket gets soaked and heavy, a phenomenon called “wet-out.” Even though you are dry inside, the waterlogged jacket shell gets cold in the wind, chilling you to the bone and taking days to dry in a motel room.
This is where laminated gear shines. The waterproof membrane is bonded directly to the outer shell, so water beads off immediately. The jacket never gets saturated, never gets heavy, and dries in a fraction of the time. While significantly more expensive, it is a superior system for managing the micro-climates of Canadian touring. It prevents the massive energy loss associated with wind-chill on a wet garment, which is a serious danger when crossing high-elevation passes in the Rockies. The best gear is a system that layers and breathes, allowing you to manage both rain and sweat without compromising your core temperature.
The Danger of Dehydration Under the Helmet: Why You Need a Hydration System
Dehydration is the silent killer of focus. Inside a helmet on a hot Okanagan summer day, you are in a personal greenhouse. You lose moisture with every breath and through sweat, often without realizing it. By the time you feel thirsty, you are already significantly dehydrated. For a motorcyclist, this isn’t just uncomfortable—it’s dangerous. Even a 2% loss in body weight from fluid loss can impair cognitive function, slow reaction time, and cause irritability and fatigue. On a motorcycle, a split-second delay in reaction is the difference between a close call and a disaster.
Relying on stopping for drinks is a flawed strategy. The hassle of taking off your helmet and gloves means you drink less often than you should. The only effective solution is a personal hydration system, like a CamelBak or similar backpack with a drinking tube that routes into your helmet. It allows you to take small, frequent sips of water while riding, maintaining optimal hydration levels continuously. This isn’t a luxury; it’s a fundamental piece of safety equipment for any serious tourer.
Keeping your body’s cooling system running efficiently directly preserves your mental and physical energy. It prevents the headaches, dizziness, and cramping that signal advanced dehydration. By making hydration effortless, you eliminate a massive and unnecessary strain on your system. You are no longer fighting your body’s basic needs; you are supporting them, allowing you to dedicate 100% of your focus to the road ahead.
Chain, Alarm, or Cover: How to Deter Theft During Overnight Stops
A stolen motorcycle is the end of your trip. But even the *worry* of theft is a drain on your mental energy. Waking up in a motel to check on your bike or being unable to relax at a dinner stop is a form of fatigue. Your security strategy should be about creating layers of deterrence that give you peace of mind, allowing you to properly rest and recover for the next day’s ride. The right strategy depends entirely on your location.
In a high-risk urban environment like an underground parking garage in Toronto or Montreal, you need a heavy-duty approach. A thick chain locking the frame to an immovable object, combined with a motion-sensitive disc lock alarm, creates both a physical and an audible barrier. Thieves look for easy targets, and this combination is anything but. Conversely, in a rural Saskatchewan motel parking lot, this may be overkill. A simple, lightweight disc lock and a discreet motorcycle cover might be sufficient.
The cover itself is a surprisingly effective tool. It not only keeps the bike dry overnight but, more importantly, it makes it anonymous. A thief can’t tell if it’s a desirable new model or an old beater, and the extra step of removing the cover is often enough to make them move on. In Canadian provincial parks, a cover also serves as a deterrent for wildlife like raccoons and porcupines who are attracted to chewing on wires and seats. Your security system should be a modular toolkit, not a single solution.
Action Plan: Tiered Security for Canadian Touring
- Urban High-Risk (Toronto/Montreal): Park in a well-lit area, preferably visible from hotel reception. Use a heavy-gauge chain through the frame to a solid object, supplemented with a disc lock alarm.
- Suburban/Motel (Most towns): A quality disc lock is your primary deterrent. Supplement this with a generic motorcycle cover to remove visual temptation.
- Rural/Campground (Provincial Parks): The cover becomes essential to protect against both opportunistic theft and curious wildlife. A simple disc lock is usually sufficient.
- Paperwork: Keep photos of your security devices. Some Canadian insurance providers offer discounts for documented anti-theft measures.
- Final Check: Before leaving the bike, give the handlebars a turn to engage the fork lock. It’s a free, built-in security layer that is often forgotten.
Average Speed vs. Photo Stops: Why You Should Add 25% to Your GPS Time
Your GPS is a liar. The Estimated Time of Arrival (ETA) it provides is based on a non-stop journey at the legal speed limit. This is a fantasy world that does not exist for a motorcycle tourer. Relying on the GPS ETA is a recipe for frustration, rushing, and fatigue. A veteran rider knows the true currency of a tour is not time, but energy and opportunity. You must plan for reality, not for the algorithm.
A good rule of thumb for Canadian touring is to add a minimum of 25% to the GPS ride time. For truly scenic routes like the Icefields Parkway, you may need to double it. This buffer accounts for the inevitable realities of the road: fuel stops, stretching, hydration breaks, and those unplanned but essential photo stops. It also absorbs time lost to road construction, ferry waits, or the classic Canadian traffic jam caused by a moose on the highway. Rushing to “make up time” is a dangerous game that burns through your energy budget and increases risk.
The Fuel Station Dictates the Pace – on routes like the Alaska Highway or Trans-Labrador Highway, the next fuel stop (300-400km away) is the only deadline that matters.
– Northern Ontario Travel, Motorcycle Touring Guide
Embracing a more realistic timeline transforms the ride from a race against the clock into a journey. It allows you the freedom to pull over for that perfect sunset shot or chat with a local at a gas station without feeling pressured. This mental shift from “destination” to “journey” is critical for long-distance endurance.
| Route | GPS Time | Realistic Time | Factors |
|---|---|---|---|
| Icefields Parkway | 3 hours | 6+ hours | Wildlife jams, photo stops, park speed limits |
| Sea-to-Sky Highway | 2 hours | 4 hours | Scenic viewpoints, traffic |
| Alaska Highway | 8 hours | 10-12 hours | Fuel stops every 300-400km |
| Trans-Labrador | 10 hours | 14+ hours | Road construction, limited services |
Why Does EPS Foam Degrade After 5 Years, Even Without a Crash?
Your helmet is the single most important piece of gear you own, but it has a finite lifespan. The common wisdom is to replace a helmet after any impact, but the silent killer of helmet safety is time. The protective layer in your helmet is a crushable foam called Expanded Polystyrene (EPS). This is what absorbs the impact energy that would otherwise be transferred to your skull. This foam degrades over time, even if the helmet sits on a shelf.
Multiple factors contribute to this degradation. The glues and resins used in manufacturing break down. Your own hair oils and sweat slowly permeate the liner and attack the foam’s integrity. Most importantly for Canadian riders, UV light from sun exposure and the constant cycle of temperature changes—from a -30°C garage in winter to a +35°C ride in summer—cause the EPS to become hard and brittle. A brittle liner doesn’t crush to absorb impact; it fractures, transferring the force directly to you.
This is why all major safety certification bodies and manufacturers recommend that helmets should be replaced every 5 years from the date of manufacture, regardless of use or outward appearance. A 10-year-old helmet that looks pristine on the outside may offer dangerously little protection on the inside. Using a helmet beyond its service life is a gamble with a catastrophic potential downside. Think of it as an expiry date on your brain’s insurance policy. A new helmet is the cheapest and most effective life insurance you can buy.
Key Takeaways
- Your true enemies on a long tour are the invisible forces of kinetic fatigue: wind noise, poor weight distribution, and temperature stress.
- Your gear is a life-support system, not an accessory. Invest in systems that manage hydration and weather proactively, preserving your energy.
- A helmet has a five-year lifespan from its manufacture date. Its protective foam degrades over time, even without impact. Replace it without exception.
Motorcycle Gear Safety Standards: Is Your Old Helmet Still Safe?
Beyond the 5-year replacement rule, the safety standard sticker on the back of your helmet is a critical piece of information. In Canada, provincial laws generally mandate a helmet that meets at least one of the major recognized standards: DOT, SNELL, or ECE. However, not all standards are created equal, and choosing the right one is an important part of your safety strategy.
The DOT (Department of Transportation) standard is the legal minimum in Canada and the US. It’s a self-certified standard, meaning manufacturers test their own helmets. SNELL is a more rigorous, independent standard often favoured for track racing due to its focus on high-energy impacts. The ECE (Economic Commission for Europe) standard is the legal requirement in Europe and is gaining widespread respect globally. The latest version, ECE 22.06, is particularly comprehensive, including tests for rotational forces, which are a major cause of brain injury.
While DOT is the legal minimum in Canada, the ECE 22.06 standard often represents a higher safety benchmark better suited for the high-speed realities of touring on major Canadian highways.
– Main Jet Motorsports, Canadian Helmet Legal Requirements Guide
For a long-distance tourer, a helmet certified to the ECE 22.06 standard is arguably the best choice. Its rigorous batch testing and focus on a wider range of impact types, including lower-speed and rotational impacts, provide a more comprehensive safety net for the varied conditions you’ll encounter on the road. Be cautious when buying a helmet in the US or online; a helmet with only an ECE sticker and no DOT sticker may not be technically legal in all Canadian provinces, even if it is a safer helmet.
| Standard | Legal in Canada | Key Features | Best For |
|---|---|---|---|
| DOT | Yes (minimum) | Basic impact protection, self-certified | Budget riders, US border crossing |
| ECE 22.06 | Yes | Rotational force testing, batch tested | High-speed highway touring |
| SNELL M2025 | Yes | Most rigorous testing, track-approved | Sport touring, racing |
| ECE only (no DOT) | Technically illegal | European standard | Not recommended for Canada |
Your next long-distance tour begins not on the road, but with the choices you make before you leave. Apply this minimalist, physics-based approach to your preparation and invest in the gear that protects your most valuable asset: your energy. Start by auditing your current helmet and packing strategy today.