A standard car kit is for inconveniences; this guide is about building a professional-grade kit for genuine Canadian survival situations.
- Success depends on gear that withstands extreme cold, not just having the gear itself.
- Strategic placement and accessibility under duress are more critical than the quantity of items you carry.
Recommendation: Audit your current kit not for what’s in it, but for its potential system failure points in a -30°C blizzard.
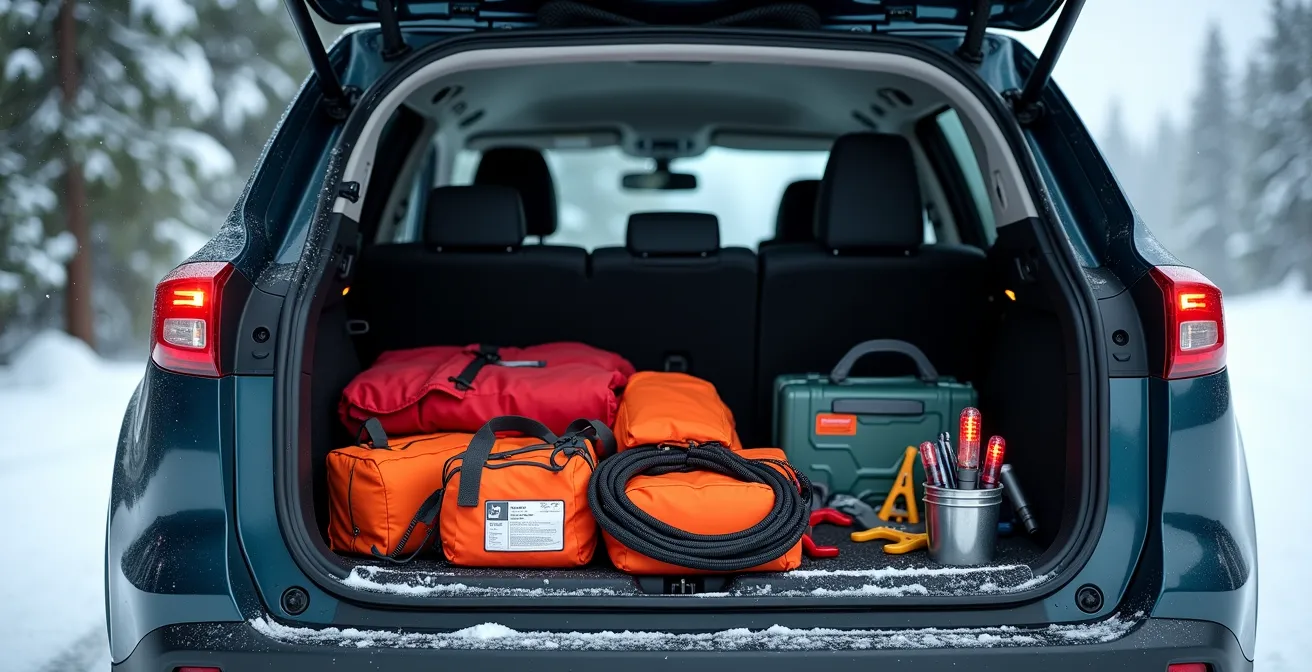
Every Canadian driver has one. That dusty bag in the trunk with a pair of flimsy jumper cables, a fleece blanket, and maybe a granola bar from last season. We’re told it’s essential, a box to tick for responsible car ownership. The common wisdom is to simply have a kit. But this mindset prepares you for a dead battery in a mall parking lot, not for a slide-off into a ditch on a remote stretch of the Trans-Canada Highway during a January whiteout.
As a roadside assistance professional, I’ve seen the stark difference between a “kit” and a “survival system.” The former offers a false sense of security, while the latter is a meticulously planned set of tools designed to function under the worst possible conditions. The real question isn’t whether you have jumper cables; it’s whether they are thick enough to carry a charge in deep cold. It’s not about having a first-aid kit; it’s about having the specific items to treat trauma or prevent frostbite while you wait hours, not minutes, for help.
This guide deliberately ignores the basic checklist. Instead, we will deconstruct the critical components of a truly effective Canadian emergency kit, focusing on the specifications, physics, and strategy that separate comfort from survival. We will move beyond the what and focus on the why: why specific gear fails in the cold, where to place a tool so it’s reachable when a car is upside down, and what it truly takes to stay safe, warm, and visible when you’re alone and the temperature is plummeting.
This article provides a deep dive into the essential, professional-grade equipment that can make a life-or-death difference in a true Canadian roadside emergency. By understanding the logic behind each choice, you can build a system that you can truly depend on.
Summary: The Professional’s Canadian Emergency Kit
- Why invest in 4-gauge jumper cables or a reliable lithium booster?
- What type of fire extinguisher is safe for an electrical or gas fire without ruining the engine?
- Where should you place your escape tool so it’s accessible when the car is upside down?
- Chemical flares or LED pucks: which signal is more visible in a snowstorm?
- What should be added to the standard kit to handle minor injuries on the road?
- Why does your engine knock on a cold start with standard oil?
- The risk of getting lost in Northern Ontario: why you need a paper map.
- Driving in Whiteout Conditions: When to Slow Down and When to Pull Over
Why invest in 4-gauge jumper cables or a reliable lithium booster?
The most common roadside failure in Canada is a dead battery, and the physics of cold is the primary culprit. A car battery is a chemical reaction, and extreme cold slows that reaction dramatically. At -10°C, you’re already facing a significant power deficit. In fact, some studies show that battery capacity can drop by up to 40% in moderately cold temperatures. This means your starter motor needs more amperage to turn over a cold engine with thick oil, precisely when your battery is at its weakest. This is the first potential system failure point in a basic kit.
Cheap, thin-gauge jumper cables (8-gauge or higher) simply cannot transfer enough power to overcome this deficit. They create too much resistance, heat up, and fail, leaving you stranded. Investing in heavy-duty, 4-gauge (or even 2-gauge) cables is non-negotiable. The lower the gauge number, the thicker the wire and the more electricity it can carry effectively in sub-zero conditions.
Alternatively, a modern lithium-ion booster pack is an excellent choice, but not all are created equal. Look for models specifically advertised with cold-weather performance ratings. A standard booster stored in a frozen trunk can be just as useless as a dead battery. The best practice is to keep the booster pack indoors when not in use or choose a premium model designed to hold a charge and deliver peak amps even when the temperature is well below freezing. This isn’t an expense; it’s an investment in a guaranteed start.
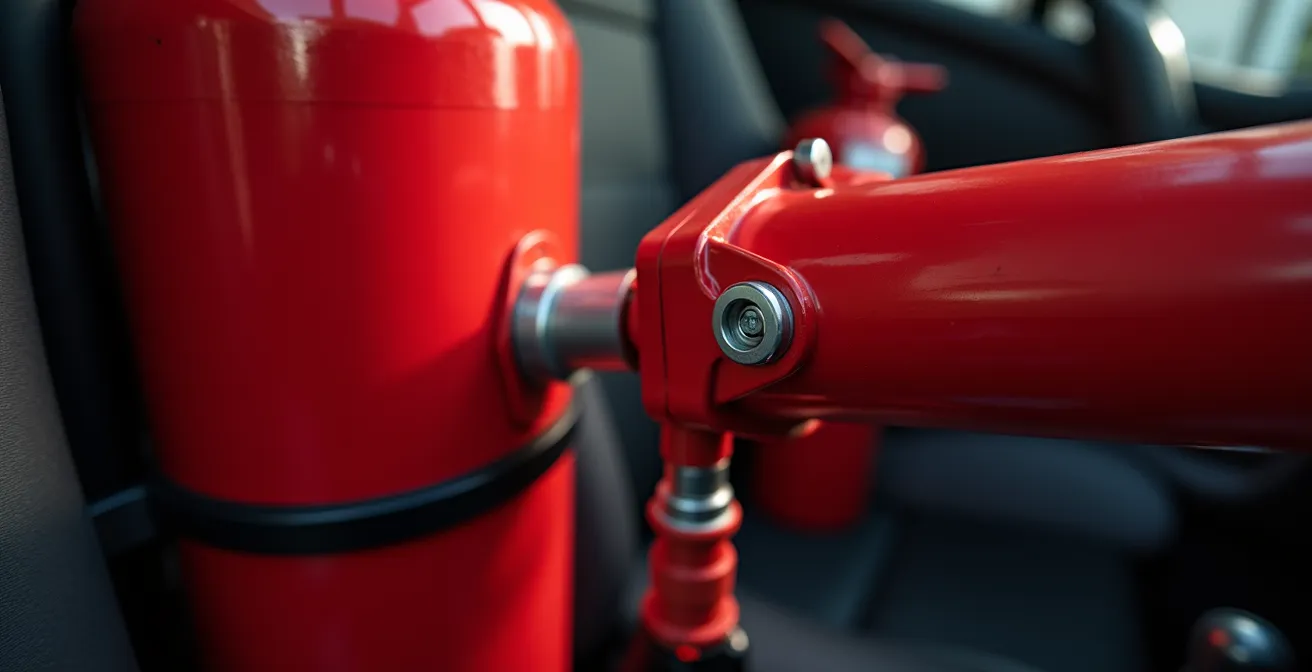
What type of fire extinguisher is safe for an electrical or gas fire without ruining the engine?
A vehicle fire is a fast-escalating, terrifying event. Using the wrong extinguisher can be ineffective or, in some cases, make the situation worse. Water is useless on a fuel or electrical fire, and many household extinguishers are not rated for this combination. In a vehicle, you face Class B (flammable liquids like gasoline) and Class C (electrical) fires. Therefore, you must carry an extinguisher with a BC rating at a minimum.
For commercial vehicles in Canada, the rules are explicit. For instance, the British Columbia Motor Vehicle Act Regulations require a specific type of protection. As Section 10.22 states:
A commercial vehicle that has a seating capacity of more than 10 including the driver must carry… a dry powder type fire extinguisher that has… a UL Rating of at least 2A:10BC.
– British Columbia Motor Vehicle Act, Motor Vehicle Act Regulations, Section 10.22
This provides an excellent guideline for personal vehicles. A 1A:10BC or 2A:10BC dry chemical extinguisher is the professional standard. The “10BC” part indicates its effectiveness against 10 square feet of liquid fire and on electrical equipment. While the dry chemical powder is corrosive and will require a thorough engine cleanup, it will extinguish the fire, which is the absolute priority. A larger fire requires a higher rating.
This table from Saskatchewan Government Insurance (SGI) provides a clear breakdown of the ratings and their applications.
| Rating | Fire Type | Vehicle Application | Engine Safety |
|---|---|---|---|
| 1A:10BC | Solids, liquids, electrical | Personal vehicles | Powder residue requires cleanup |
| 2A:10BC | Solids, liquids, electrical | Commercial requirement | Corrosive but manageable |
| 3A:40BC | All types | 2000+ school buses | Higher capacity, same cleanup needs |
Where should you place your escape tool so it’s accessible when the car is upside down?
This is a question of survival strategy, not just storage. Most drivers toss their multi-tool or emergency hammer in the glove box or a trunk organizer. This is a critical mistake. In a rollover or serious collision, the vehicle’s frame can be twisted, making a glove box impossible to open. If you are suspended upside down by your seatbelt, the trunk is on another planet. This is the concept of Accessibility Under Duress: a tool is only useful if you can physically reach and use it when you are trapped and possibly injured.
The Canadian Automobile Association (CAA) is clear on this point. In their analysis, accessibility is paramount. Their guidelines stress that tools must be within the driver’s immediate reach from a belted, seated position, as traditional storage areas become useless in the exact scenarios where you need them most. Your placement strategy must account for a worst-case scenario, not a convenient one.
An escape tool, which should combine a seatbelt cutter and a window breaker, must be secured in the driver’s immediate vicinity. “Secured” is the key word; a loose tool becomes a deadly projectile in a crash. You need to be able to reach it without unbuckling, even if the car is on its side. Your life may depend on the ability to sever a jammed seatbelt or break a side window to escape.
Your Action Plan: Strategic Escape Tool Placement
- Mount on the center console using industrial velcro strips for immediate, no-look access.
- Secure it in the driver’s door pocket, but only if it has a retention clip to prevent it from flying out.
- Attach it to the sun visor with a purpose-built elastic strap for overhead accessibility.
- Install a dedicated holder designed to fit snugly between the driver’s seat and the center console.
- Test your choice: While fully belted in, can you grab the tool in less than two seconds? If not, you must relocate it.
Chemical flares or LED pucks: which signal is more visible in a snowstorm?
Being seen is the second pillar of roadside survival, right after securing your own safety. In a Canadian winter, visibility can drop to near zero in moments. Your standard vehicle hazard lights are a good start, but they can be easily obscured by accumulating snow and may drain a weak battery. You need a dedicated, long-range signalling device. The two primary options are traditional chemical flares and modern LED pucks, each with distinct advantages in a blizzard.
Chemical flares, while single-use, have a unique advantage: they produce intense heat. A burning flare will melt the snow around it, keeping itself visible when an LED puck might be buried within minutes. Their incandescent light also cuts through falling snow with exceptional effectiveness. However, they have a limited burn time (typically 30-60 minutes) and must be handled with care.
LED pucks offer reusability and extremely long life, with some models running for over 72 hours on a single set of batteries. Their flashing patterns are designed for high visibility. Their main weakness is the physics of cold on batteries, which can reduce their lifespan and brightness, and their lack of heat means they can be quickly covered by drifting or falling snow. According to many Canadian regulations, emergency signals must be visible from at least 150 meters, a standard both can meet in clear conditions, but snow changes the equation.
The professional solution is a redundancy protocol: carry both. Use the LED pucks for long-duration marking of your position and deploy the chemical flare for a high-intensity burst of visibility if you hear an approaching vehicle or plow.
| Device Type | Visibility in Snow | Duration | Temperature Performance | Reusability |
|---|---|---|---|---|
| Chemical Flares | Excellent – heat melts snow | 30-60 minutes | Works at any temperature | Single use |
| LED Pucks | Good – can be buried by snow | 8-72 hours | Battery affected by cold | Reusable |
| Reflective Triangles | Fair – requires external light | Unlimited | Unaffected | Reusable |
What should be added to the standard kit to handle minor injuries on the road?
A basic first-aid kit with a few bandages and antiseptic wipes is designed for playground scrapes, not roadside emergencies. When help could be hours away in the rural Canadian cold, your medical kit needs to shift from “comfort” to “trauma and survival.” You must be prepared to manage more significant injuries and the physiological effects of prolonged exposure to cold.
Your primary concerns are stopping major bleeding, managing wounds, and preventing or treating hypothermia and frostbite. This means adding items that are standard issue for first responders but often overlooked by civilians. A quality tourniquet (like a C-A-T) is essential; in a situation with severe limb trauma, it is the one tool that can definitively stop life-threatening blood loss while you wait for paramedics. Similarly, an Israeli bandage provides the ability to apply significant, direct pressure to a wound far more effectively than simple gauze.
Beyond trauma, consider the environment. If you’re forced to walk for help, severe blisters can be debilitating. If you’re stuck in a car, frostbite is a real danger. As the Canadian Red Cross notes, “Big storms and serious cold can make winter driving go from challenging to scary pretty quickly.” Here are the critical additions for a true Canadian roadside first-aid kit:
- High-quality tourniquet (CAT or SOFTT-W) for severe arterial bleeding.
- Israeli or compression bandages for managing major wounds.
- Mylar emergency blankets specifically rated for sub-zero temperatures to reflect body heat and prevent hypothermia.
- Chemical hand and foot warmers to place in armpits, on the neck, and in boots to fight frostbite.
- Blister treatment supplies like moleskin for the possibility of a long walk in winter boots.
- Burn gel packets for potential burns from clearing a hot exhaust pipe buried in snow.
- High-energy, non-perishable food like protein bars that won’t freeze solid, and a plan for water (e.g., metal container to melt snow).
Why does your engine knock on a cold start with standard oil?
That unnerving clatter or knocking sound from your engine on a frigid morning is a cry for help. It’s the sound of metal components grinding together without proper lubrication, and it’s directly related to the physics of cold on your engine oil. Standard motor oil thickens dramatically as its temperature drops. Think of the difference between warm honey and honey from the refrigerator. When you try to start your car at -25°C, the oil pump struggles to suck this cold, thick sludge from the oil pan and circulate it through the engine’s narrow passages.
For a few critical seconds, parts of your engine’s valvetrain and bearings are essentially running dry. This temporary oil starvation is what causes the knocking noise and it’s a major source of long-term engine wear. The solution lies in using the right type of oil for Canadian winters. This is where the numbers on the bottle, like 5W-30 or 0W-20, become crucial.
The first number followed by a “W” stands for “Winter” and indicates the oil’s viscosity (or thickness) at low temperatures. A lower number means the oil is thinner in the cold and will flow more easily. A 0W-rated synthetic oil will flow significantly better on a cold start than a 5W or 10W oil, providing near-instant lubrication and preventing that damaging metal-on-metal contact. Using a full synthetic oil also provides superior performance, as they contain advanced viscosity index improvers that help them maintain their properties across a much wider temperature range. Choosing the right oil is not just maintenance; it’s a preventative measure against a system failure point you can’t see, but can definitely hear.
The risk of getting lost in Northern Ontario: why you need a paper map.
In the vast, sparsely populated regions of Canada, from the backroads of Northern Ontario to the highways of the Prairies, your smartphone’s GPS is a tool of convenience, not a reliable lifeline. The illusion of constant connectivity is shattered the moment you lose cell service, your phone battery dies in the cold, or the device simply fails. In these areas, getting lost isn’t an inconvenience; it’s the start of a potential survival situation. Government data confirms the prevalence of such risks, showing that 1 in 3 Canadian adults have experienced a major weather-related emergency where infrastructure can fail.
This is where a redundancy protocol for navigation becomes critical. Your primary backup should be a physical, up-to-date paper map. Specifically, the Backroad Mapbooks series, which is tailored to each Canadian province, is the gold standard. They detail not only highways but also logging roads, trails, and geographic features that don’t appear on standard digital maps. They require no power, have no software to crash, and work in all conditions.
A map alone is not enough; you need a simple, reliable magnetic compass to orient it. This low-tech combination is the most dependable navigation system on earth. While downloading offline maps to your phone is a good secondary backup, it still relies on a fragile electronic device. For true preparedness in remote Canadian territory, nothing replaces the confidence of a paper map and compass. Before any long trip into a rural area, mark your intended route and potential alternates, along with known gas stations and rest stops, directly on your map.
- Carry current Backroad Mapbooks for your province.
- Include a traditional magnetic compass and know how to use it with your map.
- Pre-download offline maps to your phone as a secondary backup.
- Pack a fully charged portable power bank to extend your phone’s operational life.
- For truly remote travel, consider a satellite communication device (like an inReach or SPOT) for true off-grid emergencies.
Key Takeaways
- Gear Specification is Critical: The performance of your equipment in extreme cold (e.g., jumper cable gauge, battery cold-cranking amps) is more important than simply having it.
- Plan for a Worst-Case Scenario: Your kit must be built for survival—handling trauma, ensuring visibility in a blizzard, and enabling escape when a vehicle is compromised.
- Low-Tech Redundancy is Key: Do not rely solely on electronics. Paper maps, a magnetic compass, and chemical flares are essential backups that work when batteries fail.
Driving in Whiteout Conditions: When to Slow Down and When to Pull Over
You’ve built the perfect kit. You have the right gear, and you know why you have it. The final test is a dynamic, high-stakes crisis: driving into a full-blown whiteout. This is one of the most dangerous situations a Canadian driver can face. Visibility disappears, the road becomes indistinguishable from the shoulder, and the risk of a multi-car pile-up skyrockets. In this scenario, your most important tool is judgment. Knowing when to slow down and, more importantly, when to stop completely is a survival skill.
The first rule is to drastically reduce your speed at the first sign of blowing snow and reduced visibility. This increases your reaction time and reduces the severity of a potential impact. Turn on your full lighting system (but avoid high beams, which reflect off the snow and reduce visibility further). Focus on the taillights of the vehicle ahead of you or the right-hand shoulder line as a guide. Do not fixate on them, but use them as a reference to maintain your lane position.
The critical decision is when to pull over. The threshold is simple: if you can no longer see the edge of the road or the vehicle in front of you, it is time to get off the road. Continuing to drive blind is gambling. However, *where* you stop is crucial. The highway shoulder is the last resort, as you are a sitting target for other drivers. The safest option is to take the next exit or pull into a rest area. If you must stop on the shoulder, pull over as far as possible, turn on your four-way hazard lights, and assess whether you should deploy a flare for added visibility. Then, stay in your vehicle. Your car is your primary shelter.
Your preparation has led to this moment. By having a professional-grade kit, you have turned a potential catastrophe into a manageable, albeit uncomfortable, waiting game. The final step is to execute your survival plan with a calm, clear head, using the tools you so carefully prepared. Evaluate your situation and deploy the necessary equipment to stay warm, visible, and safe until help arrives.
Frequently Asked Questions About Canadian Car Emergency Kits
How often should I run my engine if stranded in a whiteout?
Run the engine for only 10 minutes per hour to conserve fuel while maintaining minimal heat. Before doing so, you must ensure the exhaust pipe is completely clear of snow to prevent deadly carbon monoxide from entering the cabin.
What’s the visibility threshold for pulling over?
If you cannot reliably distinguish the painted line of the road shoulder from the driving lane, or if you lose sight of the taillights of the vehicle directly ahead, it is time to find a safe place to stop immediately. Driving blind is one of the biggest causes of highway pile-ups.
Where is the safest place to stop in whiteout conditions?
The absolute safest place is to exit the highway completely at an off-ramp, service road, or designated rest area. If you are forced to use the shoulder, pull as far to the right as physically possible and activate your hazard lights and any other emergency signals like LED pucks.